The Rpx format is the most important of all the formats available for Rpv. The application Rpv Visual Editor is designed to work with these kind of files.
What is an RPX file?
An Rpx file is a ascii file (a plain text file) that contains delimited data.
It is obvious that a report also includes a header, columns, lines images, etc.
What happens then? It happens that if we see a report we will see portions that a "fixed" and portions that are "variable".
The "fixed" portions are some texts, images lines and all the objects related to the layout. The "variable" portions are those that will vary and they are the data that the report will show.
The main goal is that your process only generates variable data to combine with the template to obtain the report.
How does the RPX format work?
The RPX file is a data collection with an certain structure and delimited by a char.
An example could be this one:
Supposing that we need to generate a customers report and we have three fields: name, last name and phone.
Robert|Koll|8831-2912|
Ralph|Williams|2212-2211|
Charles|Fisher|9981-4442|
|
Here we see three delimited records by pipe character. Each record has the same structure: name, last name and phone.
For an RPX file, it will also required to add an identifier to each line. This will be the first field.
For example, we will say that this structure is named as "details". The name is choosen by the developer.
The collection, then would be the following:
|details|Robert|Koll|8831-2912|
|details|Ralph|Williams|2212-2211|
|details|Charles|Fisher|9981-4442|
|
Please note that the first and the last character for each line is the pipe. The delimiter for the line is defined by the first char of each line. The last character must also be the delimiter.
This means that each line can have a different delimiter in case that is needed.
The structure, can be represented like this: [details: @name, @lname, @phone]
These records, with this structure must be recognized by the template to show the report.
Preparing a template from for this example
First thing we have to do is to paste this data to a text file and name it as "C:\TEMP\CUSTOMERSDATA.RPX". If you do it with the Notepad, pay attention that the extension is not TXT because notepad adds it automatically.
Contents of C:\TEMP\CUSTOMERSDATA.RPX
TEMPLATE=c:\temp\customersreport.rpv
|details|Robert|Koll|8831-2912|
|details|Ralph|Williams|2212-2211|
|details|Charles|Fisher|9981-4442|
|
This is a simple example. Add as many records as you want following always the same structure.
The first line identifies the template. Even when it is required the file is required to run the report, it is not needed that exists at design time.
When the RPX file is done, we will generate a new template with the Rpv Visual Editor doing the following:
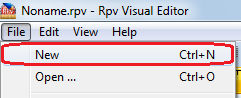
Go to menu File and then New...
The following window will appear.
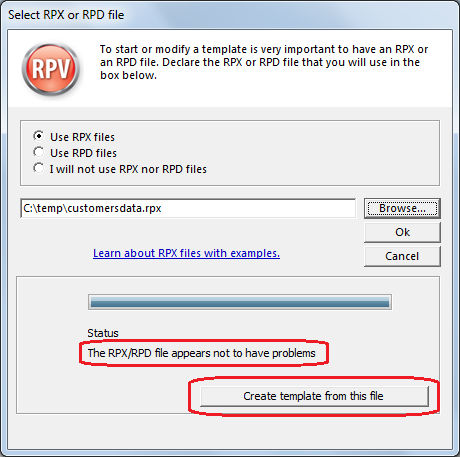
After this, a new empty template will be created according the variables they are included in the RPX file.
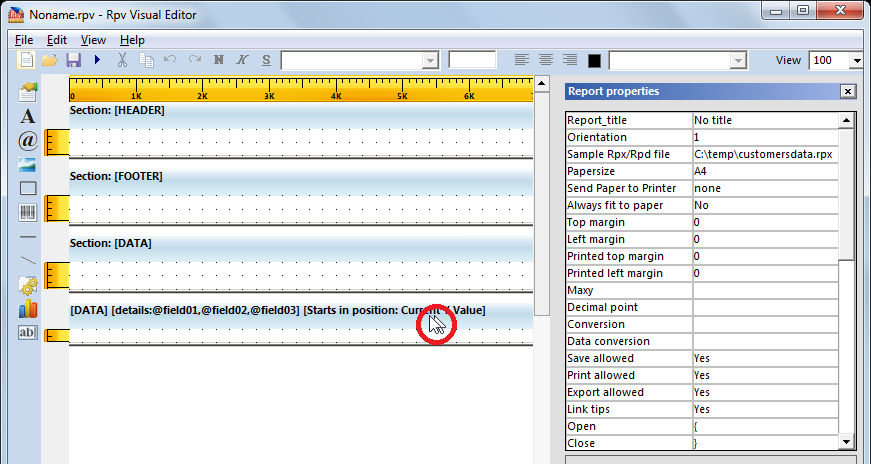
The template contains a HEADER, FOOTER and DATA sections. Additionally, it contains the DETAILS subsection depending on DATA section.
Just edit the field names on the DETAILS subsection. To do so, just double click on the DETAILS declaration.
This screen will appear:
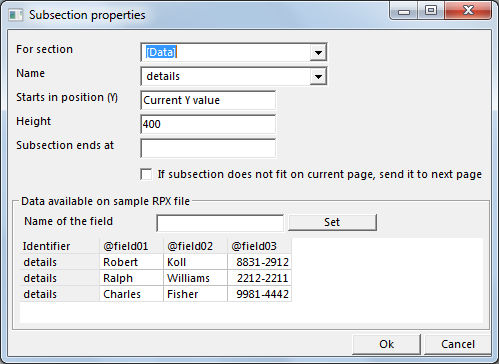
Note that is possible to see the records present in the RPX file.
Possibilities from this window:
For section: this field indicates if the subsection belongs to [header], [data], [footer] or [configuration].
Name: this name cannot be changed and is assigned from the identifier that is read from the RPX file.
Starts in position (Y): in this field is possible to set the vertical position to start the subsection each time it is printed. Default value (and recommended for most cases): "Current Y value".
Height: sets the height of the subsection.
Subsection ends at: ussually this value is the same as the height of the subsection. However, this value could be lower (never greater) than the height.
Assigning names to the fields
By default, the fields coming from the RPX file will be named as @field01, @field02, @field03 ... etc.
Although the report can work without any problem this way, it may be convenient to change the names of the fields.
To do that, just click on the column:
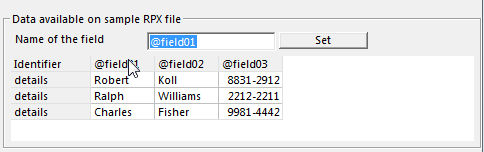
After that type the new name of the field and click "set".
When the names of the fields are set, click on the "Ok" button to insert the new subsection on the report.

Adding labels and variables to a subsection:
You can insert any object, but we will pay more attention here to the labels and variables.
The labels and the variables are the same object: LABELS. The difference between both objects is that the variable is inserted with a default value that is retrieved from the data file (Rpx or Rpd) that was declared in the "Sample Rpx/Rpd file" in the reports properties.
We will insert then labels using the tool available on the toolbar or with the combination of Ctrl-T.
To insert a variable, just press Ctrl-D. The difference will be that the variable will insert the next variable available for the subsection.
We will insert the three variables for the subsection:

In this moment you can see the report pressing F5.
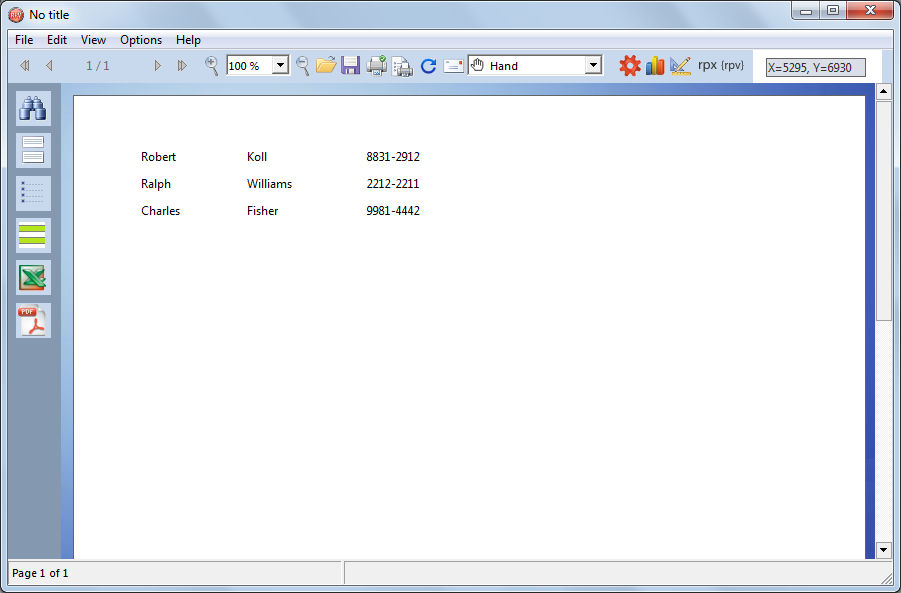
As you can see, the subsection is repeated each time that a "details" is found. If the Rpx file had more "details" lines, then it would repeat more times.
The space between lines is defined by the height of the subsection. For this case, the height is 400 twips. If the height is reduced, then the space between the lines will reduce too.
It is possible to modify the height of a subsection from the properties page or just dragging the end of the subsection.
Adding more elements to your report.
With the available tools is possible to create headers, add images, links, etc.
We prepare here a header and a footer. Remember that HEADER and FOOTER are sections and not subsections. This means that they are not affected by the data contained in the C:\CUSTOMERSDATA.RPX.
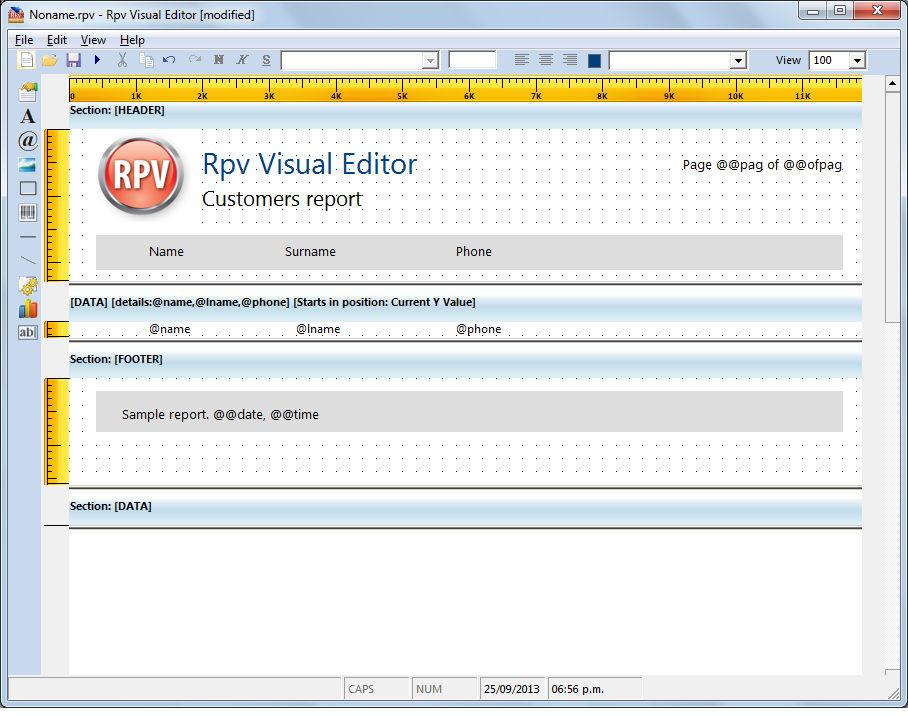
First of all, the height of the section HEADER was modified (enlarged) to produce a more attractive header that includes an image, a box and some labels.
In the FOOTER section is also included a box and a label indicating date and time.
Pressing F5 it will be possible to see how the report changes.
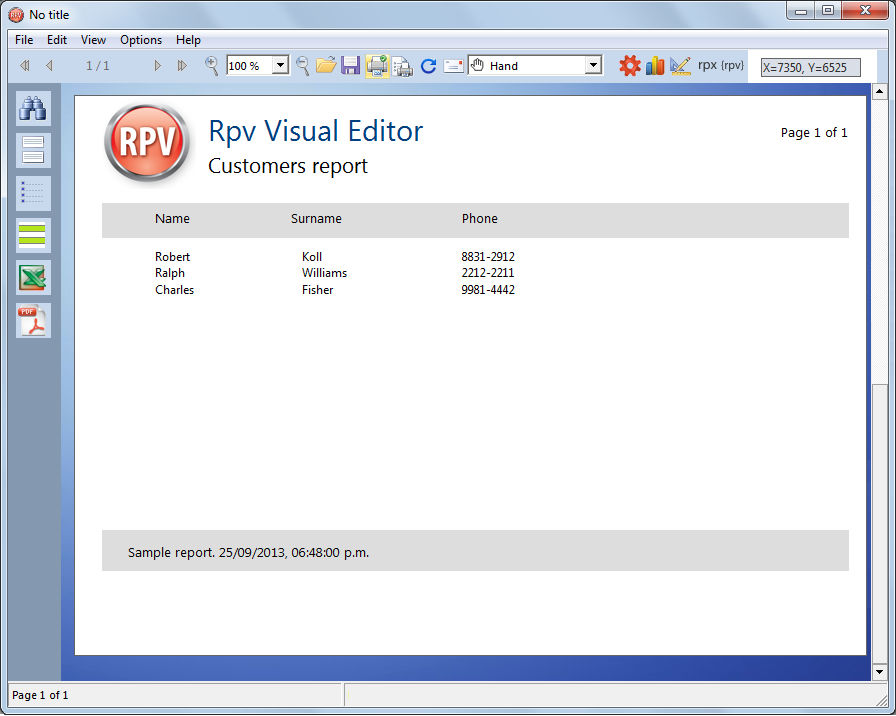
Try adding more records to the Rpx file to see how the report changes when you preview it.
Finishing the report and making it work from our program.
Once the report is done the template will be saved with a name and RPV extension. In this case we will name it as C:\CUSTOMERS.RPV.
After that, the path to the template must be added to the RPX file pointing out the template just created:
TEMPLATE=C:\CUSTOMERS.RPV
Where "C:\CUSTOMERS.RPV" in this case is the file that we just saved. Below this line it will be placed the rest of the information.
Contents of C:\CUSTOMERSDATA.RPX
TEMPLATE=C:\CUSTOMERS.RPV
|details|Robert|Koll|8831-2912|
|details|Ralph|Williams|2212-2211|
|details|Charles|Fisher|9981-4442|
|
How to call it from our program.
This task can be performed in different ways depending on the programming language. In any case, the file that must be called is the RPX and not the template. In case that the RPV (the template) is called, then the report will be shown without data.
For example, if we use Visual Basic we can call the report using the following syntax:
Shell "c:\program files\rpv\rpv.exe C:\CUSTOMERSDATA.RPX"
From Cobol:
CALL 'SYSTEM' USING 'rpv.exe C:\CUSTOMERSDATA.RPX'.
See also
Hello world video.
|
